In attempting to reduce email spam, the email hosting industry introduced SPF (Sender Policy Framework) and later DomainKeys DNS records. These are simply DNS entries in your zone that help to verify which server/s are allowed to send email for your domain.
Ensuring that you have configured the both SPF and DomainKeys for your domain will help in preventing emails that you send getting flagged as SPAM and either getting rejected by the recipient server or going into the recipients junk/spam folder.
With Farbyte's UK cPanel hosting you have the ability to enable and configure both SPF and DomainKeys records for your account via the use of the cPanel 'Email Authentication' tool.
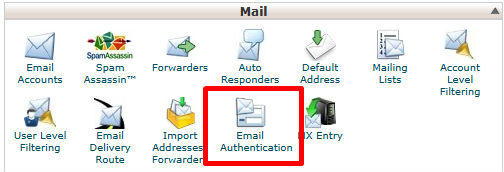
By default both settings are disabled and we recommend that all clients enable and configure these options as soon as they can. Simply log into your cPanel account and under Mail, click the Email Authentication icon.

This will take you to the Email Authentication configuration page.
DomainKeys is the easiest to configure, simple click the Enable button and you are done.
SPF is a little bit trickier, but not much. First click the Enable button under the SPF heading then, under advanced settings:
- Additional Hosts – add any additional FQDN for mail servers that are allowed to send email for your domain. If you are on a Farbyte shared IP, you can leave this blank, however, if you are paying for a dedicated IP, at Farbyte, we will have setup reverse DNS on the IP address and email for your account will be configured to be sent from that IP, so add your domain name to this field (e.g. mydomain.com).
- Additional MX Servers – add any additional MX records. With Farbyte shared hosting you would normally leave this blank.
- Additional IP Blocks – you may add your dedicated IP if you have one, otherwise leave blank.
- Include List – for including SPF records from other hosts. Normally leave this blank.
- All Entry – tick this option when you are sure that you have included all the servers and IPs that are allowed to send email for your domain.
- Overwrite Existing Entries – leave this ticked, as it will ensure any existing SPF records are removed and replaced with your new one.
Finally, click the Update button at the bottom of the page and you all set!

